30 seconds. Three clicks. Community ready.
Template → name → confirm. From there on it's your community. Linking groups, inviting members, configuring roles are steps you take whenever you want, at your own pace. No rush, no database, no licenses.
- 01 Start the bot
- 02 Create the community
- 03 Link a group
- 04 Set the language
- 05 Invite members
- 06 First action
Steps 1–2: the 30 baseline seconds. Everything else is optional and progressive.
1Start the bot
Open Telegram, search for @MyTavoraBot and press Start (or write /start). If you don't have any community yet, at the top of the menu you'll see a gold button: Create your first community. Press it to begin.
If you already have one and want to create another: My communities → New community.
2Create the community
The procedure is short and linear: 3 steps, one field at a time, no forms to fill out.
- 1
Template
Choose a preset: association/party, community staff, company, student council, editorial team, condominium, or start from scratch. Templates are not locked in — they pre-configure sensible roles and permissions for your context, but you fine-tune them however you want afterwards.
- 2
Name
One line. It's how members will see it in all cards and messages published in groups.
- Optional
Base permissions
You see this only if you chose "Start from scratch": you decide what a new member can do by default (propose, vote, create tasks, etc.). With a template it's skipped — permissions are already preset sensibly and you can change them later from the Roles and permissions guide.
- 3
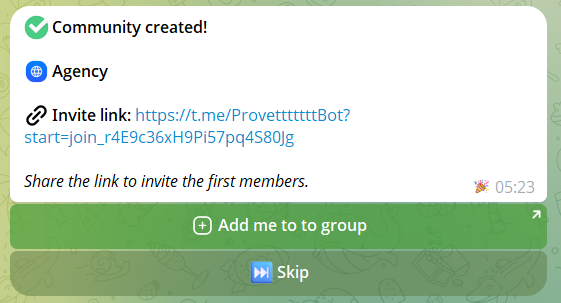
Confirm
Final summary + choice on whether join requests are pre-approved or require manual approval. Press confirm and the community is created.
Emoji, picture and other customizations are set AFTER, not during creation: from the community menu → Management → Customize. Same for the publication language (you'll see it later) and custom roles. During creation we ask only the bare minimum to get started.
3Link a group
A Tavora community lives in Telegram groups: that's where you vote, discuss, work on tasks. Add @MyTavoraBot to your group and promote it to administrator — the bot writes you privately and asks which community to link it to. Alternatively, from a group the bot is already in, type /link.
A community can link up to 10 groups, each with independent settings. For details see the Linking Telegram groups guide.
4Set the publication language
Go to Management → Settings → Language and choose the language the bot will use to write in linked groups: proposal cards, vote outcomes, task cards, minutes. 16 languages are available.
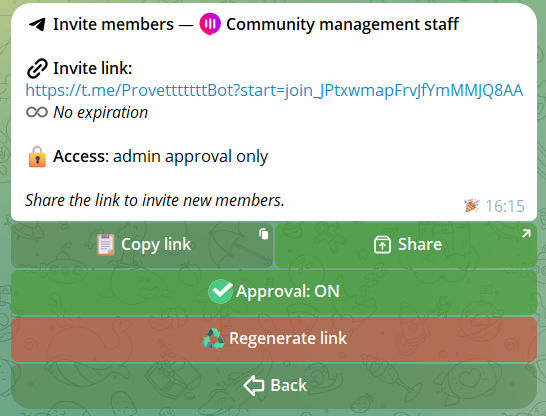
5Invite and assign roles
Now you open the community to people. Generate a Tavora invite link from Management → Members → Invites: single-use or reusable, with optional expiry. You share it wherever you want and whoever opens it walks straight into the community. For targeted invites to a specific person there's /add @username from a linked group: the bot sends them a personal request they accept or decline. If you want extra control, turn on the approval queue in Settings: every new join waits for your OK and you accept one by one or all at once.
Roles are how you give different powers to different people: Founder, Admin, Member system roles plus up to 20 custom roles — each with its own emoji and permissions. Tavora always respects the role hierarchy: no admin can remove anyone above them, and every ban is tracked with author and date. Full details (the 11 granular permissions, search, request management) are in the Roles and permissions guide and the Members guide.
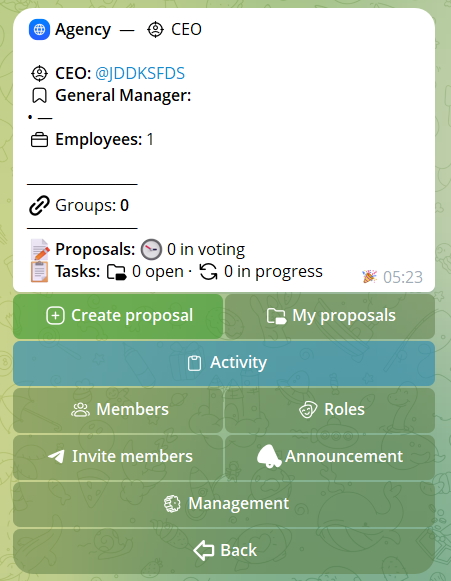
6First action
You have the community, you have the group, you have the first members. The advice now is to run the loop at least once, even as an experiment. You understand Tavora by using it, not by reading.
A proposal
Go to private chat: My communities → [your community] → New proposal. Publish it in the group, open the vote, get votes, export the PDF. For the full flow: Proposals and Agenda guide and Voting guide.
A task
In the group: /newtask Test first task !high @someone 30/04. Card created, assignee, due date. Close with /done. Commands and advanced features: Tasks — In groups guide and Tasks — In private guide.
7Announcements: targeted and scheduled
When there's something to tell everyone — or just a few people — you don't need to rewrite it group by group: from the community menu press Announcement, first decide who receives it, then write the message once and choose when it goes out.
📣 Targeted announcements
Pick the audience: 👥 all members (in private), 🏷 only those with certain roles (in private as well), or 📢 direct publication in the groups you choose. Before sending you see the recipient count: you know exactly how many people you'll reach.
🕐 Scheduling
Send now, or Schedule with a date and time in the community's time zone. Scheduled announcements stay visible — and cancellable — in the Scheduled view. Sending runs in the background without blocking the bot and, once delivery is complete, you get a confirmation in private.
8Practical tips
Six practices that make a difference, all based on features the bot really has:
Pick the closest template
A political party has different roles than an editorial team. Start from the template closest to your context and fine-tune, instead of building from scratch.
Separate "leadership" group
Create a second group (executive board, section heads, etc.) linked to the same community. Operational decisions there, public groups for communications and open votes.
/add command for direct invites
To bring in specific people use /add @username from the group: the bot sends them a personal request, they accept and join. More targeted than the generic link for contacts you already know.
Pin the task dashboard
Publish the dashboard in the leadership group and pin it: it auto-updates every 2 minutes giving leadership a constant view, without having to search manually.
Async and sync together
It's not either/or. Use async for daily work (tasks with deadlines, proposals open to members) and switch to sync when you have a formal meeting: agenda with ordered items and live voting, minutes at the end of the session.
Export to PDF after every decision
Every closed vote or task cycle you export as a digitally-signed minute (RSA SHA-256). Solid archive, reusable if needed.
Setup complete.
The community is alive, the loop is running. The other guides go deeper into every aspect: groups, members, roles, customization, proposals, voting, archive, tasks in private, tasks in groups.